Affichage des articles dont le libellé est Recovery. Afficher tous les articles

lundi 6 juillet 2015

TeamWin Recovery Project for the Samsung Galaxy S6 released


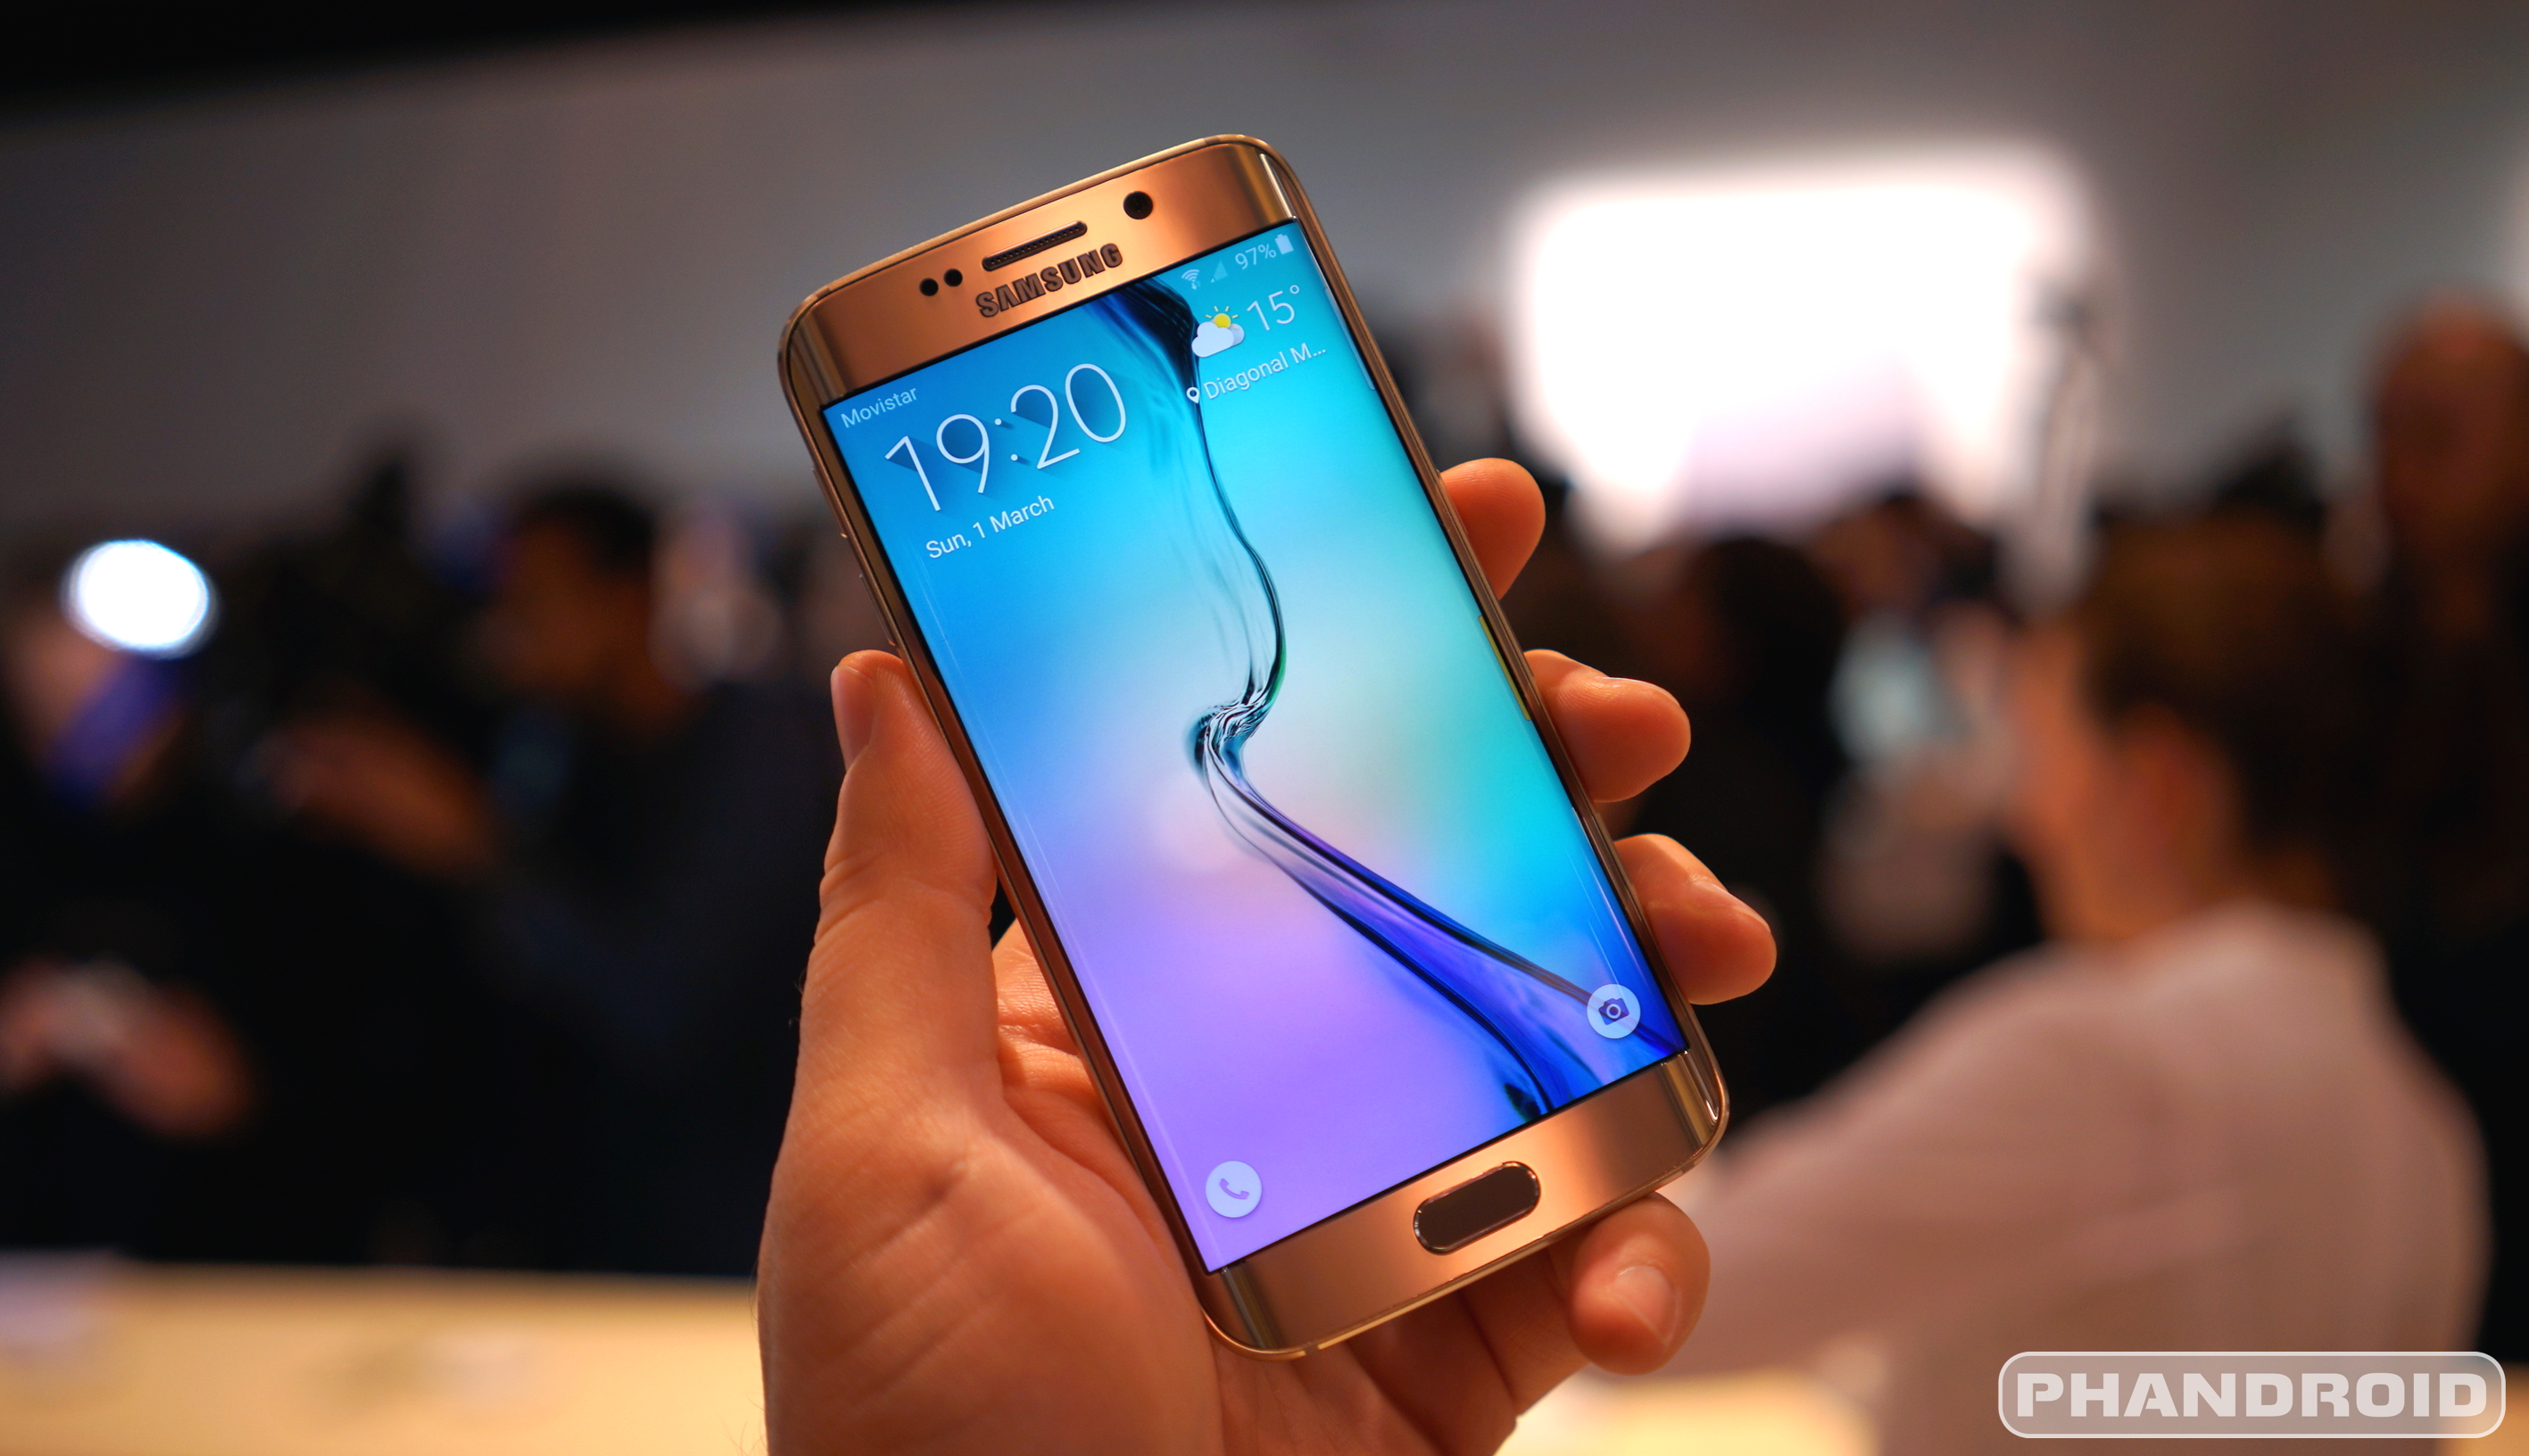
Samsung Galaxy S6 Edge DSC08448


In case you were wondering whether the best custom recovery in the land would come to the Samsung Galaxy S6 and S6 Edge, wonder no more. TeamWin has released TWRP (TeamWin Recovery Project) for the Samsung Galaxy S6.


There are install methods that support both rooted (download this app from Google Play for a quick and easy install) and unrooted (flash a file through Odin) devices so if a custom recovery is what you desire there should be little in your way to get it.


TeamWin has download links and installation instructions right here, so be sure to check it out if you’re interested. Remember to read everything thoroughly, only use TeamWin’s recommended download links, and know that anything that happens as a result is no one’s fault but your own. Knowing all that, have at it!


How to Install TWRP Recovery Sprint Galaxy S5 SM-G900P


You can now install a full functioning  TWRP Recovery on Sprint Galaxy S5 SM-G900P. Although, the TWRP  released isn’t official yet, but it was already tested on Sprint Galaxy S5 SM-G900P, and it will worked well.  Sprint Galaxy S5 G900P is not actually comes with a locked bootloader, so this simply means it has a highly manageable system for further development and customizing its original software appearance.  So if you want to give it a try right now, just simply read the rest of the process on how you can acquire a working  TWRP Recovery on your Sprint Galaxy S5 SM-G900P.


One more thing, flashing any custom recovery tripped Knox security counter and switched your phone phone from official into custom. Before that I would like to advise you especially if your a completely a beginner without any knowledge of what the risk involved on this method, you should make a careful research first before attempting to modify your phone. This process will void your phone’s warranty, so please be aware with that before you proceed.


Note: Installing Custom recovery will trip KNOX counter from 0×0 to 0×1. Once the KNOX security flag counter tripped you will lose your phone’s warranty.


Step by Step Guide on How to Install TWRP Recovery on Sprint Galaxy S5 SM-G900P


Download CF-Auto root for Galaxy S5 SM-G900P (Sprint): CF-Auto-Root-kltespr-kltespr-smg900p.zip


Download TWRP Recovery for Sprint Galaxy S5 G900P


Get the TWRP recovery here: http://forum.xda-developers.com/devdb/project/dl/?id=5608
You can read the full details about the TWRP recovery from XDA’s highly-recognized developer [PlayfulGod] at XDA’s origina thread.


Download Odin and USB driver:
Odin3_v3.09 download
Galaxy S5 USB Driver  download


Install the USB Driver


Simply run the downloaded USB driver to install. Without the USB driver your computer will not recognize your Galaxy S5.


Getting Started on Installing TWRP Recovery


Prepare a Windows base OS computer or laptop – Odin flasher tool will not run on MAC and other OS.
Use the supplied USB cable –  A bad USB cable will be causing flashing errors.
Unzip or extract the files –  compressed file can be extracted using 7zip, winzip, winrar or any unzipping program in your computer.
Enable USB debugging mode – if you are having issues connectingyour device to the computer try to enable the this option. In your Samsung Galaxy S5, go to Settings>> About device>> then look for the firmware build number and then tap that build number for around 7-times until a message pop-ups that says something “congratulations you are now a developer”.
Remove the external micro SD card – if you have one, to avoid any failures and error during the flashing process.
TURN OFF the Reactivation Lock – This is only needed if you already turned-it-ON, from which you cannot modify the system when it’s turned-ON. Just tap on Settings>>Security>>Reactivation Lock and then uncheck the Turn Reactivation lock on.


Assuming that your phone is rooted and custom recovery image then you may proceed to the quick guide below.


Run and Configure Odin


Run Odin downloader Odin3_v3.09 on your PC desktop. Watch out the check-boxes options on the right top of Odin, ensure that the ‘RE-PARTITION’  and  the ‘AUTO-REBOOT , just leave alone the ‘F.RESET TIME’ check-box remained checked.


Reboot your Galaxy S5 into Download Mode


To reboot the Galaxy S5 into  download mode , you need to turn the power off.  After it completely shut off,  just  press and hold the Volume Down key,  Home button and the Power ON/OFF button simultaneously.


You should then prompted into a warning screen and asking you  to press volume up if you want to continue or volume down to cancel, just simply press volume up to get into download mode. The download mode then displays an Android robot and say’s “Downloading.. Do not turn off target!!”


Connect your Phone to PC or Laptop


Once you already reboot the phone in download mode,  simply connect the phone to your PC or laptop USB.
In Odin window – the ID:COM box will turn to blue color and indicates the COM port number and a word “Added” on a log box will prompt you that the device is already detected or recognized by Odin.


Your COM port number might be different from mine. If you do not see a COM port number then there’s something missing or wrong. You may read again from the top of this post.


Installing CF-Auto root


1) Unzip the CF-Auto-Root-kltespr-kltespr-smg900p.zip.
2) Click on Odin’s AP button and then load CF-Auto-Root-kltespr-kltespr-smg900p.tar.md
3) Hit the “START” button.
4) Wait until it reboots after you successfully installed the CF-Auto-Root.
5) Proceed to installing TWRP Recovery and you need to reboot your Galaxy S5 into download mode again.


Root Sprint Galaxy S5 with CF-Auto-Root


Installing TWRP Recovery file in Odin


Simply click on the AP button, then browse to the folder where you put the TWRP Recovery file “twrp-klte.tar.md5″ that you have previously downloaded and then select and load it.
Odin should look like this picture below.


Sprint Galaxy S5 TWRP recovery


Flashing the TWRP Recovery


Once if all set and ready to fire-up, hit the “START” button in Odin to begin flashing the TWRP  Recovery.
Do not ever interrupt the phone while already in flashing progress, like disconnecting the cable or turning off the device. Just wait until it completely finish.


Lastly, Reboot the phone into recovery!


When the TWRP Recovery installation successfully completes, you will then see a word “PASS” in Odin. This indicates that the flashing was already finish, and on the log box it says “All threads completed. (succeed 1 / failed 0)”.  Now, once you see that word “PASS!”  do not let it reboot into normal mode but instead directly reboot it into TWRP recovery.  Do this:
– Press and hold Volume Up, Home and Power button.
– Use volume keys to select, Up and Down and Power or Home key to select the option
– Select “Reboot to system” using the Home button.
– It will then prompts you to configure some settings, then simply always answer “YES” to the given questions.
– Done.


From here you should have a fully working TWRP  Recovery running on your Sprint Galaxy S5 SM-G900P . You may then able to install any amazing custom firmware built from XDA- Developers according  to your liking.


The post How to Install TWRP Recovery Sprint Galaxy S5 SM-G900P appeared first on GalaxyS5Update.


How to Install TWRP Recovery Australia Galaxy S5 SM-G900I


Install a full functioning  TWRP Recovery on Australia’s Samsung  Galaxy S5 SM-G900I variants. This TWRP  Recovery  isn’t officially built, but it was already tested on Australia Galaxy S5 SM-G900I, and it will worked well. Australian Samsung Galaxy S5 SM-G900I variants  are not actually comes with a locked bootloader compared to those released on select US carriers, so this simply means it has a highly manageable system for further development and customizing its original software appearance.  So if you want to give it a try right now, just simply read the rest of the process on how you can acquire a working  TWRP Recovery on your Australian version of Samsung Galaxy S5 with model number SM-G900I.


One more thing, flashing any custom recovery tripped Knox security counter and switched your phone phone from official into custom. Before that I would like to advise you especially if your a completely a beginner without any knowledge of what the risk involved on this method, you should make a careful research first before attempting to modify your phone. This process will void your phone’s warranty, so please be aware with that before you proceed.


Note: Installing Custom recovery will trip KNOX counter from 0×0 to 0×1. Once the KNOX security flag counter tripped you will lose your phone’s warranty.


Step by Step Guide on How to Install TWRP Recovery on Australia Galaxy S5 SM-G900I


Download CF-Auto root for Galaxy S5 SM-G900I (Australia): CF-Auto-Root-klte-kltedv-smg900i.zip


Download TWRP Recovery for Australia Galaxy S5 G900I


Get the TWRP recovery here: http://forum.xda-developers.com/devdb/project/dl/?id=5608
You can read the full details about the TWRP recovery from XDA’s highly-recognized developer [PlayfulGod] at XDA’s origina thread.
Download Odin and USB driver:
Odin3_v3.09 download
Galaxy S5 USB Driver  download


Install the USB Driver


Simply run the downloaded USB driver to install. Without the USB driver your computer will not recognize your Galaxy S5.


Getting Started on Installing TWRP Recovery


Prepare a Windows base OS computer or laptop – Odin flasher tool will not run on MAC and other OS.
Use the supplied USB cable – A bad USB cable will be causing flashing errors.
Unzip or extract the downloaded files – compressed file can be extracted using 7zip, winzip, winrar or any unzipping program in your computer.
Enable USB debugging mode – if you are having issues connectingyour device to the computer try to enable the this option. In your Samsung Galaxy S5, go to Settings>> About device>> then look for the firmware build number and then tap that build number for around 7-times until a message pop-ups that says something “congratulations you are now a developer”.
Remove the external micro SD card – if you have one, to avoid any failures and error during the flashing process.
TURN OFF the Reactivation Lock – This is only needed if you already turned-it-ON, from which you cannot modify the system when it’s turned-ON. Just tap on Settings>>Security>>Reactivation Lock and then uncheck the Turn Reactivation lock on.


Assuming that your phone is rooted and custom recovery image then you may proceed to the quick guide below!


Run and Configure Odin


Run Odin downloader Odin3_v3.09 on your PC desktop. Watch out the check-boxes options on the right top of Odin, ensure that the ‘RE-PARTITION’ and the ‘AUTO-REBOOT , just leave alone the ‘F.RESET TIME’ check-box remained checked.


Reboot your Galaxy S5 into Download Mode


To reboot the Galaxy S5 into download mode , you need to turn the power off. After it completely shut off, just press and hold the Volume Down key, Home button and the Power ON/OFF button simultaneously.


You should then prompted into a warning screen and asking you to press volume up if you want to continue or volume down to cancel, just simply press volume up to get into download mode. The download mode then displays an Android robot and say’s “Downloading.. Do not turn off target!!”


Connect your Phone on your computer or Laptop


Once you already reboot the phone in download mode, simply connect the phone to your PC or laptop USB.
In Odin window – the ID:COM box will turn to blue color and indicates the COM port number and a word “Added” on a log box will prompt you that the device is already detected or recognized by Odin.


Your COM port number might be different from mine. If you do not see a COM port number then there’s something missing or wrong. You may read again from the top of this post.


Installing CF-Auto root


1) Unzip the CF-Auto-Root-klte-kltedv-smg900i.zip.
2) Click on Odin’s AP button and then load CF-Auto-Root-klte-kltedv-smg900i.tar.md5
3) Hit the “START” button.
4) Wait until it reboots after you successfully installed the CF-Auto-Root.
5) Proceed to installing TWRP Recovery and you need to reboot your Galaxy S5 into download mode again.


Root Australia Galaxy S5 SM-G900I


Installing TWRP Recovery file in Odin


Simply click on the AP button, then browse to the folder where you put the TWRP Recovery file “twrp-klte.tar.md5″ that you have previously downloaded and then select and load it.
Odin should look like this picture below.


Sprint Galaxy S5 TWRP recovery


Flashing the TWRP Recovery


Once if all set and ready to fire-up, hit the “START” button in Odin to begin flashing the TWRP Recovery.
Do not ever interrupt the phone while already in flashing progress, like disconnecting the cable or turning off the device. Just wait until it completely finish.


Lastly, Reboot the phone into recovery!


When the TWRP Recovery installation successfully completes, you will then see a word “PASS” in Odin. This indicates that the flashing was already finish, and on the log box it says “All threads completed. (succeed 1 / failed 0)”. Now, once you see that word “PASS!” do not let it reboot into normal mode but instead directly reboot it into TWRP recovery. Do this:
– Press and hold Volume Up, Home and Power button.
– Use volume keys to select, Up and Down and Power or Home key to select the option
– Select “Reboot to system” using the Home button.
– It will then prompts you to configure some settings, then simply always answer “YES” to the given questions.
– Done.


From here you should have a fully working TWRP Recovery running on your Australia’s Galaxy S5 SM-G900I . You may then able to install any amazing custom firmware built from XDA- Developers according to your liking.


The post How to Install TWRP Recovery Australia Galaxy S5 SM-G900I appeared first on GalaxyS5Update.


How to Install TWRP Recovery Bell, Rogers, Telus Galaxy S5 SM-G900W8 Canada Variants


Here’s  is a guide that will show you on how to install a full functioning TWRP Recovery on Canadian Samsung Galaxy S5 SM-G900W8 variants. This TWRP Recovery isn’t officially built, but it was already tested  and it will worked well on Bell, Rogers, Telus, Fido, Koodo and Wind Galaxy S5 SM-G900W8 variants. The Canadian  Samsung Galaxy S5 SM-G900W8  are not actually comes with a locked bootloader compared to those released on select US carriers, so this simply means it has a highly manageable system for further development and customizing its original software appearance. So if you want to give it a try right now, just simply read the rest of the process on how you can acquire a working TWRP Recovery on your Canadian version of Samsung Galaxy S5 with model number SM-G900W8.


One more thing, flashing any custom recovery tripped Knox security counter and switched your phone phone from official into custom. Before that I would like to advise you especially if your a completely a beginner without any knowledge of what the risk involved on this method, you should make a careful research first before attempting to modify your phone. This process will void your phone’s warranty, so please be aware with that before you proceed.


Note: Installing Custom recovery will trip KNOX counter from 0×0 to 0×1. Once the KNOX security flag counter tripped you will lose your phone’s warranty.


Step by Step Guide on How to Install TWRP Recovery on Galaxy S5 SM-G900W8, Variants in Canada


Download CF-Auto root for Canada Galaxy S5 SM-G900W8 CF-Auto-Root-kltecan-kltevl-smg900w8.zip


Download TWRP Recovery for Canada Galaxy S5 SM-G900W8


Get the TWRP recovery here: http://forum.xda-developers.com/devdb/project/dl/?id=5608
You can read the full details about the TWRP recovery from XDA’s highly-recognized developer [PlayfulGod] at XDA’s origina thread.
Download Odin and USB driver:
Odin3_v3.09 download
Galaxy S5 USB Driver  download


Install the USB Driver


Simply run the downloaded USB driver to install. Without the USB driver your computer will not recognize your Galaxy S5.


Getting Started on Installing TWRP Recovery


You should make sure that you have a back up copy of all of your irreplacable data stored from your phone. If you hadn’t make any back-ups then its now the best time to do it. Also recharge your phone right now if its battery power is getting low, a power failure while installing the firmware to your phone may caused undesired outcomes.
Prepare a Windows base OS computer or laptop – Odin flasher tool will not run on MAC and other OS.
Use the supplied USB cable – A bad USB cable will be causing flashing errors.
Unzip or extract the downloaded files – compressed file can be extracted using 7zip, winzip, winrar or any unzipping program in your computer.
Enable USB debugging mode – if you are having issues connectingyour device to the computer try to enable the this option. In your Samsung Galaxy S5, go to Settings>> About device>> then look for the firmware build number and then tap that build number for around 7-times until a message pop-ups that says something “congratulations you are now a developer”.
Remove the external micro SD card – if you have one, to avoid any failures and error during the flashing process.
TURN OFF the Reactivation Lock – This is only needed if you already turned-it-ON, from which you cannot modify the system when it’s turned-ON. Just tap on Settings>>Security>>Reactivation Lock and then uncheck the Turn Reactivation lock on.


Assuming that your phone is rooted and custom recovery image then you may proceed to the quick guide below!


Run and Configure Odin


Run Odin downloader Odin3_v3.09 on your PC desktop. Watch out the check-boxes options on the right top of Odin, ensure that the ‘RE-PARTITION’ and the ‘AUTO-REBOOT , just leave alone the ‘F.RESET TIME’ check-box remained checked.


Reboot your Galaxy S5 into Download Mode


To reboot the Galaxy S5 into download mode , you need to turn the power off. After it completely shut off, just press and hold the Volume Down key, Home button and the Power ON/OFF button simultaneously.


You should then prompted into a warning screen and asking you to press volume up if you want to continue or volume down to cancel, just simply press volume up to get into download mode. The download mode then displays an Android robot and say’s “Downloading.. Do not turn off target!!”


Connect your Phone on your computer or Laptop


Once you already reboot the phone in download mode, simply connect the phone to your PC or laptop USB.
In Odin window – the ID:COM box will turn to blue color and indicates the COM port number and a word “Added” on a log box will prompt you that the device is already detected or recognized by Odin.


Your COM port number might be different from mine. If you do not see a COM port number then there’s something missing or wrong. You may read again from the top of this post.


Installing CF-Auto root


1) Unzip the CF-Auto-Root-kltecan-kltevl-smg900w8.
2) Click on Odin’s AP button and then load CF-Auto-Root-kltecan-kltevl-smg900w8.tar.md5
3) Hit the “START” button.
4) Wait until it reboots after you successfully installed the CF-Auto-Root.
5) Proceed to installing TWRP Recovery and you need to reboot your Galaxy S5 into download mode again.


Root Bell, Rogers, Telus Galaxy S5 SM-G900W8


Installing TWRP Recovery file in Odin


Simply click on the AP button, then browse to the folder where you put the TWRP Recovery file “twrp-klte.tar.md5″ that you have previously downloaded and then select and load it.
Odin should look like this picture below.


Sprint Galaxy S5 TWRP recovery


Flashing the TWRP Recovery


Once if all set and ready to fire-up, hit the “START” button in Odin to begin flashing the TWRP Recovery.
Do not ever interrupt the phone while already in flashing progress, like disconnecting the cable or turning off the device. Just wait until it completely finish.


Lastly, Reboot the phone into recovery!


When the TWRP Recovery installation successfully completes, you will then see a word “PASS” in Odin. This indicates that the flashing was already finish, and on the log box it says “All threads completed. (succeed 1 / failed 0)”. Now, once you see that word “PASS!” do not let it reboot into normal mode but instead directly reboot it into TWRP recovery. Do this:
– Press and hold Volume Up, Home and Power button.
– Use volume keys to select, Up and Down and Power or Home key to select the option
– Select “Reboot to system” using the Home button.
– It will then prompts you to configure some settings, then simply always answer “YES” to the given questions.
– Done.


From here you should have a fully working TWRP Recovery running on your Canadian Galaxy S5 SM-G900W8 . You may then able to install any amazing custom firmware built from XDA- Developers according to your liking.


The post How to Install TWRP Recovery Bell, Rogers, Telus Galaxy S5 SM-G900W8 Canada Variants appeared first on GalaxyS5Update.


Install CWM Advanced Philz Touch Recovery on Galaxy S5 G900H, G900F International Variants


You can now install the CWM Advanced edition or Philz Touch Recovery on Samsung Galaxy S5 SM-G900H (Exynos) and the SM-G900F (Snapdragon) variants.  The updated version  of PhilZ Touch recovery to  6.26.6 has worked on International Galaxy S5 variants. The new  unified (klte) basically built and work for  International, Canada, Sprint, T-mobile, Verizon  Galaxy S5 but due to some carrier bootloader locked issues it hasn’t perfectly tested yet, but  I will try to cover for that on other Galaxy S5 when a due time comes.


If you knew about CWM (ClockWork Mod recovery) then it can be sure that you also know the Philz Touch Recovery. Philz Touch Recovery is actually the  CWM recovery but added with numerous features you could ever miss in CWM such as the full touch interface and a completely configurable GUI experience. It has been tested and a well proven perfect and a safe custom recovery for many phones before the Galaxy S5 existence.


CWM recovery Galaxy S5


But before you may proceed let me refresh you some important notes relating to the installation of custom recovery. Advanced user of Android smartphones already knows about it but if this is your first time heard about this method, you may need a careful research first before attempting to apply this guide I written here.


Note: Installing Custom recovery will trip KNOX counter from 0x0 to 0x1. Once the KNOX security flag counter tripped you will lose your phone’s warranty.


Step by Step Guide on How to Install Philz Touch Recovery on Galaxy S5 SM-G900H, SM-G900F


Download CF-Auto root for SM-G900F (Snapdragon): CF-Auto-Root-klte-kltexx-smg900f.zip
Download CF-Auto root for SM-G900H (Exynos Octa): CF-Auto-Root-k3g-k3gxx-smg900h.zip


Download Philz Touch Recovery 6.26.6 or the most latest updated build


Get the Philz Touch Recovery 6.26.6 or any latest build versions from
here: http://goo.im/devs/philz_touch/CWM_Advanced_Edition/klte
Select this file: “philz_touch_6.26.6-klte.tar.md5″ which is the Odin flashable.
You can read the full details about the Philz Touch recovery from XDA’s highly-recognized developer [Philz] at XDA’s original thread.


Download Odin and USB driver:
Odin3_v3.09 download
Galaxy S5 USB Driver  download


Install the USB Driver


Simply run the downloaded USB driver to install. Without the USB driver your computer will not recognize your Galaxy S5.


Getting Started on Installing CWM Advanced Edition Philz Touch Recovery


Prepare a Windows base OS computer or laptop – Odin flasher tool will not run on MAC and other OS.
Use the supplied USB cable –  A bad USB cable will be causing flashing errors.
Unzip or extract the files –  compressed file can be extracted using 7zip, winzip, winrar or any unzipping program in your computer.
Enable USB debugging mode – if you are having issues connectingyour device to the computer try to enable the this option. In your Samsung Galaxy S5, go to Settings>> About device>> then look for the firmware build number and then tap that build number for around 7-times until a message pop-ups that says something “congratulations you are now a developer”.
Remove the external micro SD card – if you have one, to avoid any failures and error during the flashing process.
TURN OFF the Reactivation Lock – This is only needed if you already turned-it-ON, from which you cannot modify the system when it’s turned-ON. Just tap on Settings>>Security>>Reactivation Lock and then uncheck the Turn Reactivation lock on.


Assuming that your phone is rooted and custom recovery image then you may proceed to the quick guide below.


Run and Configure Odin


Run Odin downloader Odin3_v3.09 on your PC desktop. Watch out the check-boxes options on the right top of Odin, ensure that the ‘RE-PARTITION’  and  the ‘AUTO-REBOOT , just leave alone the ‘F.RESET TIME’ check-box remained checked.


Reboot your Galaxy S5 into Download Mode


To reboot the Galaxy S5 into  download mode , you need to turn the power off.  After it completely shut off,  just  press and hold the Volume Down key,  Home button and the Power ON/OFF button simultaneously.


You should then prompted into a warning screen and asking you  to press volume up if you want to continue or volume down to cancel, just simply press volume up to get into download mode. The download mode then displays an Android robot and say’s “Downloading.. Do not turn off target!!”


Connect your Phone to PC or Laptop


Once you already reboot the phone in download mode,  simply connect the phone to your PC or laptop USB.
In Odin window – the ID:COM box will turn to blue color and indicates the COM port number and a word “Added” on a log box will prompt you that the device is already detected or recognized by Odin.


Your COM port number might be different from mine. If you do not see a COM port number then there’s something missing or wrong. You may read again from the top of this post.


Installing CF-Auto root


1) Unzip the CF-Auto-Root-klte-kltexx-smg900f.zip if you have the Galaxy S5 SM-G900F (Snapdragon),
or CF-Auto-Root-k3g-k3gxx-smg900h.zip if you have the Galaxy S5 SM-G900H (Exynos).
2) Click on Odin’s AP button and then load CF-Auto-Root-klte-kltexx-smg900f.tar.md5 or CF-Auto-Root-k3g-k3gxx-smg900h.tar.md5.
3) Hit the “START” button.
4) Wait until it reboots after you successfully installed the CF-Auto-Root.
5) Proceed to installing Philz Touch Recovery and you need to reboot your Galaxy S5 into download mode again.Root Galaxy S5 G900F with CF-Auto-Root


Load the philz_touch_6.26.6-klte.tar.md5  file in Odin


Simply click on the AP button, then browse to the folder where you put the “philz_touch_6.26.6-klte.tar.md5″ you have previously downloaded and then select and load it.
Odin should look like this image below.


Galaxy S5 Philz Touch Recovery


Flash the Philz Touch Recovery


Once if all set and ready to fire-up, hit the “START” button in Odin to begin flashing the Philz Touch Recovery.
Do not ever interrupt the phone while already in flashing progress, like disconnecting the cable or turning off the device. Just wait until it completely finish.


Lastly, Reboot the phone into recovery!


When the Philz Touch Recovery installation successfully completes, you will then see a word “PASS” in Odin. This indicates that the flashing was already finish, and on the log box it says “All threads completed. (succeed 1 / failed 0)”.  Now, once you see that word “PASS!”  do not let it reboot into normal mode but instead directly reboot it into recovery.  Do this:
– Press and hold Volume Up, Home and Power button.
– Use volume keys to select, Up and Down and Power or Home key to select the option
– Select “Reboot to system” using the Home button.
– It will then prompts you to fix root and recovery, then simply always answer “YES” to the given questions.
– Done.


From here you should have the Philz Touch Recovery running on your Galaxy S5 SM-G900H or SM-G900F. You may then able to install any customization firmware from XDA- Developers to your likings.


The post Install CWM Advanced Philz Touch Recovery on Galaxy S5 G900H, G900F International Variants appeared first on GalaxyS5Update.